I’ve been avoiding the construction of the abutments for my trestle and
bridge for a while, mostly because I didn’t have the slightest idea of how I
was going to construct them. I am now at the point where I cannot continue
my layout terrain without the abutments being in place. I knew I wanted the
abutments to have a brick look, so I started to do some research on how to
accomplish this. I found two options; the first to use brick textured
styrene and the second was to cast the abutments in plaster. I opted with
the latter option, mainly due to cost and availability.

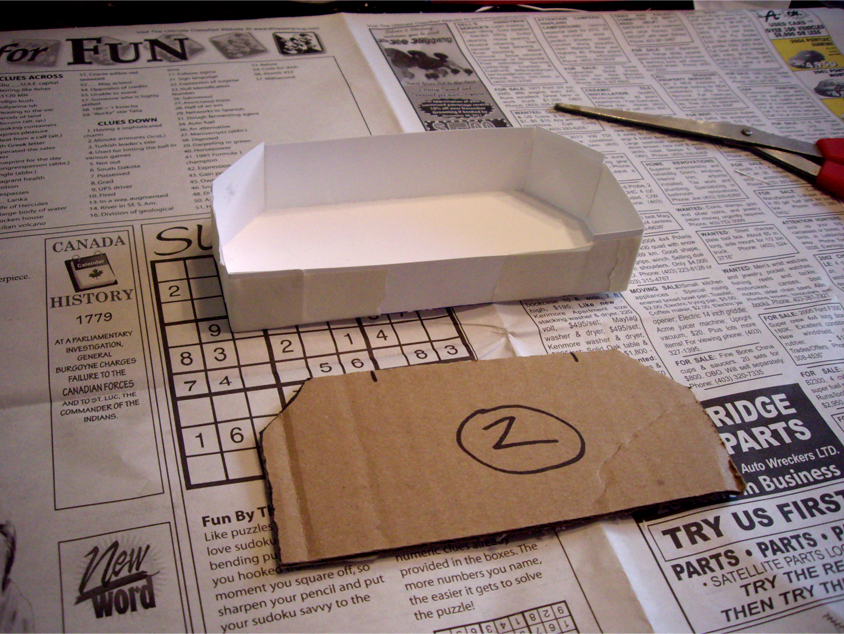
I first started by making a cardboard template of each abutment to ensure
that it fit properly on the layout. I notated on each template the front and
back so I didn’t mix them up. I used each template to create a basic form
out of heavy cardstock and masking tape, ensuring that the face of the mold
was level and flat. It's important to remember that the form needs to be
built in the REVERSE direction of the front of your structure. In other
words, the template needs to be mirrored and should lay in the form
back-side facing up. This is a mistake that I narrowly avoided, which would
have resulted in backwards abutments.
I used plaster of Paris for the castings, mixing it until smooth. I then
quickly filled the form to about 1/2" thick, shaking the form to evenly
settle the plaster. While the plaster set, I butted books up against each
edge of the form to prevent the form’s walls from bowing outward. Cardstock
worked fine for this type of casting, as long as the plaster wasn’t too wet
which would warp and tear the form.

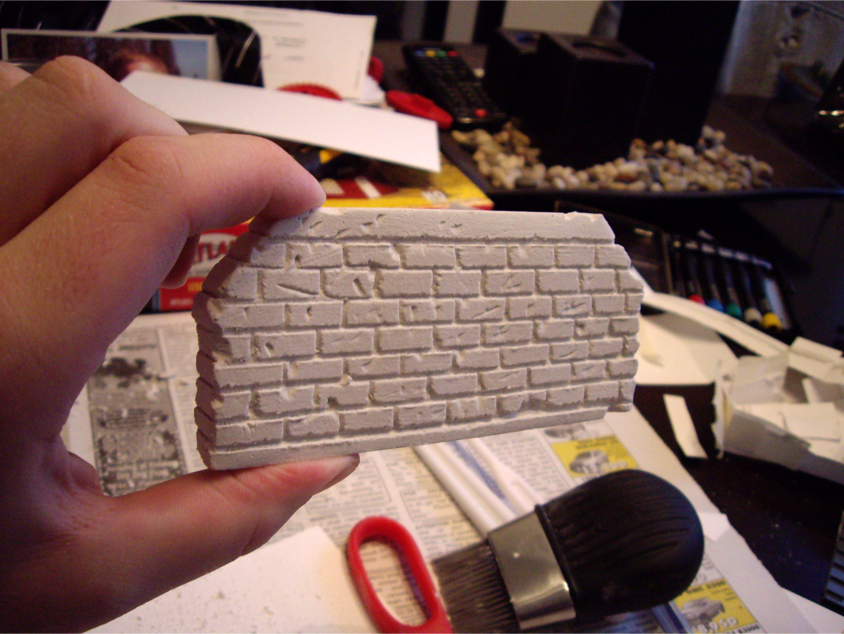
After the casting set for about 10-15 minutes, I gently tore away the paper
form. I then smoothed out and rough edges, which were most apparent on the
back side. At this point the plaster was solid, but still wet enough to
carve. I used a ruler and a scissor blade to carve the brick pattern. After
the cast was a little more firm, I etched cracks and gouges in the bricks to
make them look a bit more weathered. I then gave the abutment a final brush
with a firm nylon brush which gave the plaster some texture while removing
any loose plaster pieces.

Because plaster of Paris has such a fast setting time and thus a very short
window to work with, I only cast and carved one abutment at a time. If I had
even poured two at the same time, the second would be too hard to carve by
the time I finished the first.

1 comments
Students can download Telangana Sr, Jr Inter Question Paper in PDF format from this web page below given links. Telangana Inter 1st & 2nd Year Exam are organised by Board of Intermediate Education Telangana Only. Regular and Private Students in BIE Telangana Students must register for the public exam after preparing for their exam using these sample papers Telangana Sr, Jr Inter Question Paper Inter 1st & 2nd Year Time Tables are also available on this website for students. Students benefit from the BIE Telangana Inter 1st & 2nd Year Bit Bank and Question Bank because they provide a solid practise example for solving papers effectively.
ReplyDelete